Simulations of Electrical Interactions
Today’s lab will investigate the nature of electrical interactions
between charged objects by means of simulation programs. There are two simulations and a
number of options for each.
Electric Field Hockey is an educational game, where a
charged puck must be steered around obstacles and into the net by using charges that are
‘stuck down’ to the surface (i.e. they are fixed). By adjusting the location of
the sticky charges, you can generate the needed trajectory to make a goal.
EMField is a more traditional simulation that allows you
to investigate the nature of the electric field vectors, electric field lines, electric
potential, electric equipotentials, and Gauss’s law (plus a number of things dealing
with magnetism). This program is differs from other simulations in that the charges can be
dragged about the screen and the various quantities will automatically be recalculated for
the new charge distribution.
Preparation
These programs were developed in the late 1980's and early 1990's. We
have found no other programs that are as good as these two, so we continue to
use them in 2017 and beyond. The program will not run under recent
versions of Microsoft Windows, so we will be using a 'Windows 95 Virtual
Machine' (VM) to run the programs. Only the keyboard, mouse and screen are
available outside the VM. Hopefully, these steps will help you to cope
with the limited resources and to gain significant knowledge from the programs.
| Start PowerPoint on the lab Computer. Click the
'Start Button'. If PowerPoint... is not near the top of the
taskbar, type power into the search box just above the 'Start Button'
and it will appear at the top. Click it to start. Choose a
blank presentation. Then minimize PowerPoint. |
|
Start the Windows 10 Snipping Tool. The icon is
to the right. It may be on the taskbar, otherwise Click on the
Windows 10 'Start' button and type snipp It will show up at the top of
the list click it.
- Click new on the snipping tool and your screen
will become grayish.
- Use your mouse to draw around some of the icons
on the left side of the screen. The area will be captured.
- Restore your PowerPoint and past the image into
the slide. Adjust the size of the capture until it occupies
about 1/4 of the slide's area in the upper left region.
- Minimize PowerPoint again.
|

|
| Check to see if the Windows 95 VM is already running.
If it is the icon to the right, will appear in the task bar. If it
is not present double click on the icon labeled by Windows 95. Wait for it to fully start. |

|
| If Windows 95 takes up most of the screen, grab the
upper left corner and drag it to the right until it occupies about one
half of the screen. |
|
- Move your mouse into the Windows 95 VM.
Notice that the mouse pointer changes from an arrow to a hand with
the index finger extended. Click on the green desktop of the
Windows 95 VM and the mouse pointer will turn into an arrow again.
The mouse pointer is likely to be bound to the VM - i.e. you won't
be able to move outside of the Windows 95 VM. This is called
Mouse Capture.
- Simultaneously press <Ctl><Alt> and then release.
The mouse pointer turns back into a hand and can be moved anywhere
on the screen. Move it to the Windows 10 desktop and click.
This 'anchors' the mouse to Windows 10 so that it works normally.
- Move back into the VM and click on the desktop to
capture the mouse.
|
|
| Double Click on the Electric Field Hockey icon to
start field hockey. |
 |
| Click on the 'Begin' button at the lower right corner
of the Field Hockey Window. Follow the onscreen instructions. |
 |
Part One : Electric Field Hockey
Play the game for levels 1, 3, and 5.
After completing each game, capture the Electric Field Hockey screen as
described under the snipping tool and paste it into PowerPoint. Note: If
you experience difficulty in solving the game, you may need to do the earlier games as
well. Using your solution to game 5, answer the following
questions .
Look at the trajectory of the puck. At what points in the
puck’s trajectory is the magnitude of its acceleration small or zero? How can you
tell by looking at the trail left by the puck? (hint: The dots are placed at
equal time intervals.)
At what points in the puck’s trajectory is its acceleration
greatest? (Remember that acceleration is a vector.) How can you tell from looking
at the trail left by the ball?
Find a point on the trajectory where the net force on the puck was in a
different direction than the puck’s velocity. Draw and label vectors showing the
force on the puck and its velocity at this point. (Remember that the velocity is tangent
to the trajectory, and that the direction of the acceleration is the same the direction of
the change in velocity over that time interval.)
Turn on the force vectors (under the Display menu) and check your
answers to the above questions. Remember that acceleration is proportional to force.
Capture the screen with the arrows and include it in a new slide in
your PowerPoint in the upper left region.
Next add one more charge in the upper right corner of the screen. Is the trajectory
altered? If so, capture and add the screen to your PowerPoint slide, otherwise, move the charge around a little until the
trajectory is altered, and then add the image PowerPoint. Stay far away from your other charges.
Finally, move the extra charge to the lower right corner, and repeat the previous steps.
- Since the Coulomb force falls off very rapidly with distance, one would expect that a
far away charge would have negligible effect. However, in the previous exercise, you
should have seen a large effect. Look at your captured screens and carefully compare the
trajectories, especially along the first segment. Explain why the far-away charge had
an appreciable effect.
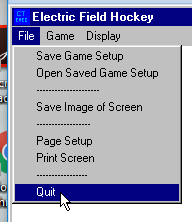
Close Electric Field Hockey by using the 'File' and 'Quit' options as
shown in the image.
Do NOT close the program using the 'x' in the
upper right hand corner of the window. It may cause
difficulties for the next user.
Part Two: EMField
In EM field, you will be able to paste down the charge and produce a sketch of the
force on a second object at a particular point in space. (Actually you will be looking at
the Electric Force Field, usually called the Electric Field.)
- Open the Program EM field by double clicking its icon.

- Select the Source menu and use 3D point charges.
- Drag
a positive point charge onto the experimental area.
- In order to familiarize yourself with
the program Click on the screen at points located on the perimeter of concentric circles.
- Sketch your results in your notebook.
-
What determines the size of the electric field?
-
What determines the direction of the electric field?
-
What is the polarity of the test charge at the experimental point?
The next section is semi-quantitative in nature. Select the ‘Constrain to
Grid’ option and the ‘Show Grid’ option. The charges will always be placed
on one of the grid ‘dots’. However, you can still Click at any point that you
desire. You can add more charge to a given location by dropping additional charge on top
of the preexisting charge.
Dependence of the Electric Field on Charge
You will use the grid unit as a scale to measure lengths of representative force
vectors to the nearest tenth of a grid square using the grid on the screen of the computer
as a ruler. The first investigation is to see how does charge affect the size of the
electric field at a particular point? To do this you will place a +2 charge on the screen.
How long is the electric force vector at a distance of one grid unit away on the screen?
Be sure to very carefully position the mouse before clicking, since the location is NOT
constrained to the grid. Clean the screen and change to a charge of +4 by dropping a
second +2 charge on the first. How long is the force vector one grid unit away on the
screen? Clean the screen, and repeat with +8 units of charge. Record your data and write a
conclusion.
Verify your conclusion by repeating the steps with +3, +6 and +9 charges. Measure one
grid unit away. Record your results and state whether it affirms or contradicts your
conclusion. Make a small GRAPH of the Electric Field versus the Charge.
- Is your line straight? If not make a second GRAPH of Electric Field versus
(Charge)2.
- How does the magnitude of the electric field vector depend on the charge that is
present? Explain?
Dependence of the Electric Field on Distance
Next, you will investigate how the distance from the charge affects the size of the
electric field vector? To do this, use a +17 charge near the left edge of the screen.
Carefully measure from the center of the charge to a point that is 1 grid unit, 2 grid
units, ... and 6 grid units away from the charge. Click to generate the field vector and
record your results. Make a GRAPH of Electric Field versus the Distance using
Graphical
Analysis. Note: once you have data for Electric Field (E) and
Distance (x) in Graphical Analysis, you can use that program to calculate
related values such as 1/Distance, without having to use your calculator and
type in new values.
- Is the line straight?
- If the graph is not linear, make a graph of Electric Field versus 1/Distance.
- If that graph is not straight, make a graph of Electric Field versus (1/Distance)2.
- Based upon your graphs, how does distance affect the size of the electric field
vector? Explain.
Check your results by measuring the field one unit from a +10 charge. Predict the
force two grid units from the charge. Record your prediction and your measured result. Do
you feel they agree well enough to support the model. Be sure to include
your Graphical Analysis plot with your report!
Now let’s look at dipoles.
- Place a +9 and -9 charge two grid units apart near the center of the screen.
- In your notebook, draw the two charges and roughly sketch a circle around them.
- Use your knowledge of addition of vectors, to predict the direction of the dipole field
at the top, bottom and sides of the circle. This should be pretty easy.
- Now try to predict the direction of the field at points half way in between these around
the circle. This is considerably more challenging.
-
Now use the program to check your predictions.
-
How do the results compare to your predictions.
-
Explore the size of the electric field at various points around the
dipole.
-
What differences do you notice compared to a single charge.
-
Comment of the pattern of the directions of the field. This may
be easier if you change to directional arrows only. (Under Fields and Potentials menu)
This eliminates the magnitude of the field information and makes all the arrows the same
size.
The program will also draw those cute electric field pictures you have
been seeing in your textbook. Clear the screen. With the dipole still displayed,
switch to Field Lines and click around to
draw in some lines. Does it look as you expected? Now change the
magnitude of one of the charges
so you no longer have symmetry. What does this do to the pattern? Are there some parts
of the pattern that don’t change much while other parts do? Make both charges
the same sign. What does this do to the pattern? Does the field look as you would
expect at large distances from the charges?
Sketch the diagram in your notebook.
-
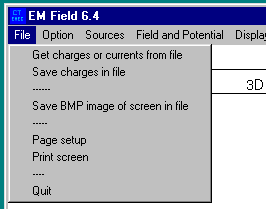
Close EM Field by using the 'File' and 'Quit' options
as shown in the image.
Do NOT close the program using the 'x' in the
upper right hand corner of the window. It may cause
difficulties for the next user.
-
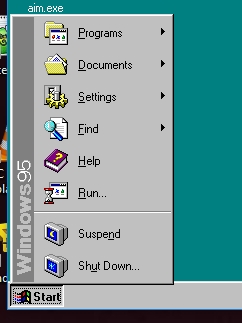
Close Windows 95 by clicking on the 'Start' button and then
'Shutdown' as shown in the image. Do NOT close the program using the 'x' in the
upper right hand corner of the VM Player (Windows 95) window. It
will cause problems for the next person starting VM Player.
-
Print your PowerPoint slides and close PowerPoint.
Complete the report for these experiments in your notebook.
Last modified March, 2018